4-Bit-Microcontroller
Introduction
This is a basic 4-bit microcontroller built using Logisim software, designed for educational and learning purposes. It features a custom instruction set with 16 instructions, 16 bytes of program space, and 5 bytes of nibble-addressable RAM. The microcontroller doesn’t have any input/output interface, protocol support, debugging support or even assembler or compiler. This microcontroller is not suitable for any real-time applications, it is built for learning the basics of microcontroller architecture, assembly language programming and understanding how a microcontroller works internally. The repository includes the source files for the microcontroller, schematics, documentation, and example programs. The user is expected to have basic knowledge of assembly language programming to work with this microcontroller.
Features
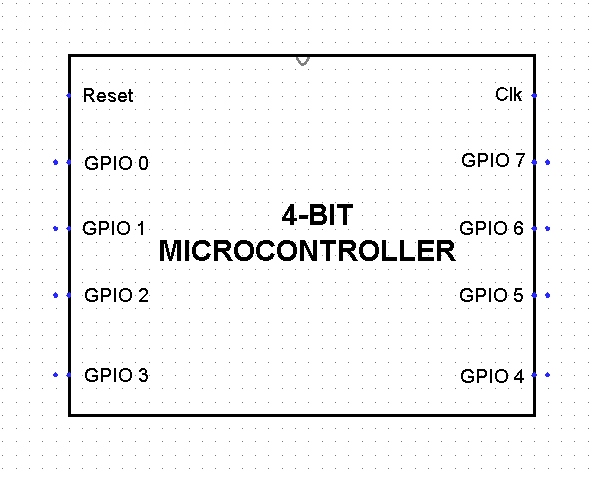
- 4-bit architecture
- 8 GPIO pins
- 16 bytes of program space
- 5 bytes of RAM
- 16 instructions in instruction set
Instruction Set

Structure of Instruction

Requirements
- Logisim software
Setup and Installation
- Download and install the Java Runtime Environment required for Logisim software from the website.
- Download the Logisim software executable file from the website.
- Clone or download the source files from the GitHub repository.
- Launch the Logisim software by opening the downloaded Logisim executable file.
Glimpse of Working
See inside the Microcontroller while it runs the program
Getting Started
As you know the Program of any microcontroller is stored in the ROM. In this 4-bit Microcontroller we have 2 ROMs(each 16 x 4 bits), ROM1 to store the OPCODE part of Instruction and ROM2 to store the OPERAND/ADDRESS part of the Instructions. So every Instruction is 1 byte (8-bits).
After Installation of Java Runtime Environment and opening Logisim software, follow these steps:
Step 1: Click on File -> Open -> Navigate to the ‘Logisim files’ folder in the downloaded repository -> Microcontroller circuits and open ‘Up, Down Counter Program.circ’ file.

Step 2: Next, Load the Example program. To open the Microcontroller block, single click on the block to select it and then double click on the small Magnification icon. Then navigate inside the ROM block. Right click on the ROM1 block -> select Load image, navigate to the Programs folder in the repository -> Up, Down Counter Folder -> select ROM1. Again follow similar steps to load ROM2.

Step 3: Later, Load the RAM. Open the Microcontroller block and navigate inside Memory Management with RAM block. Right click on the RAM block -> select Load image, navigate to the Programs folder in the repository -> Up, Down Counter Folder -> select RAM.

Step 4: Now, the Microcontroller is ready to run the Program. Select the Frequency of simulation to 64Hz for optimal view(You may increase or decrease the frequency according to your need). Start the Simulation.

Contributing
Feel free to report any bugs or suggest new features by creating an issue in the GitHub repository.
License
This project is licensed under the MIT License. You can find the full license text in the LICENSE file.